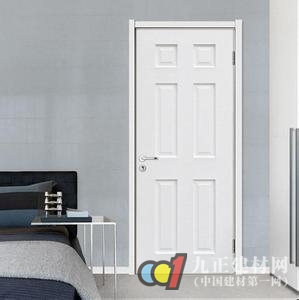
| First, the installation conditions 1. It is necessary to adopt the installation method of the reserved hole, and it is strictly forbidden to install the side wall. 2. The installation work must be carried out after the installation of the ground works (such as floor tiles and stone materials) at the door. If the wall is wet, the moisture-proof material should be used for isolation. Second, the installation tool Electric hammer, wood hoe, flat boring, side planer, fine tooth saw (gang saw), screwdriver, square ruler, tape measure, hanging hammer, electric drill, hole opener, stamp, corresponding specification drill. Third, the installation materials Self-tapping Screws, wood screws, styrofoam, towels, small wooden strips, glue, door locks, hinges, door suction, wall moisture-proof materials, iron sheets. Fourth, the installation program First check whether the components of the wooden door are complete, whether the dimensions of the components are correct, and whether the positions of the sets of doors to the corresponding installation are consistent with the size of the door opening. 1, assembly door cover First find the door cover and the vertical plate. According to the back number, the joint should be on the same plane. Apply glue to the interface. Put the 80mm wood screw on the hole behind the interface and tighten it with a screwdriver. Do not put the screws directly into the entry sleeve, check whether the size between the nozzles is correct, whether the joints are flat and firm, and then install the iron on the back of the door panel. When installing the iron, use 25mm. Tapping screws, the spacing of the iron pieces is preferably 300-350mm, and the iron piece is 200mm away from the ground. 2, install the door cover Put the assembled door cover into the door hole and fix the door cover with a small wooden strip. The two sides of the door cover should be on the same plane as the wall. Then check whether the whole door cover is perpendicular to the ground. Whether the two corners of the board are at right angles, whether the door panel is bent or not, and the iron pieces are twisted at both ends to wrap the wall. According to the position of the reserved hole on the iron piece, drill the 8mm hole on the wall with the electric hammer, plug it with a small wooden strip, fix the iron piece to the wall with 80mm wood screws, and then use the small wooden strip to fix the door cover and the wall. The gap between the bodies is filled tightly, and the door cover is re-checked for compliance with the door, and then the styrofoam is inserted. 3, install the door leaf First open the hinge groove, the distance between the hinge groove and the door leaf is preferably 1/10 of the height of the door leaf, and the heavy door should be equipped with 3 hinges. The depth of the hinge groove is preferably the thickness of the hinge piece. To install the hinge, use the screw that matches the hinge. The screw should be tightened with a screwdriver. You can't use the hoe to drive the screw directly. After the hinge on the door is fixed, the hinge on the door cover should only be screwed first. Screw, then close the door to check whether the left and right gaps of the door are the same, whether the opening is flexible, and then confirm the correctness, then tighten the other screws. 4, install the door lock According to the provided lock type, it is installed to the corresponding position. The height of the lock position is 900-1000mm from the ground. After installation, check whether the door leaf and door lock switch are flexible and whether the seam is in compliance with the specifications. 5, install the door line According to the size of the installation site, cut the wire saw with right angle edge into a 45 degree bevel, trim it with a flat or woodworking planer, insert it into the door pocket at the right angle, and stick the door line to the door panel with the floor glue. At the 90-degree touch point, the bevel angle is uniform, flat, and the joint is tight. The joint of the door sleeve is glued firmly. At the two ends of the door sleeve, the corner nail is fixed with a small straight nail. 6. Install the door suction at the corresponding position. Five, installation quality acceptance criteria 1, the mouth is consistently good. 2. The door leaf and door lock switch are flexible. 3. The left, right and upper gaps of the door leaf are the same. The specific dimensions are: 3--4mm on the left and right, and 8--12mm on the ground. 4, the door cover vertical set plate should be perpendicular to the ground level, no bending and twisting phenomenon. 5. The door sleeve line is in close contact with the wall surface. 6, the decorative surface is not damaged. 7, a full set of solid wood doors after cleaning has been installed (on site clean) [ Follow the WeChat public account "Jiuzhengmen Window Network"; pay attention to courtesy, scan code to send millions of business opportunities! Jiuzhengmen window network exchange group ] Bolt Sleeve,M8 Sleeve Anchor,Hex Sleeve Anchor,Galvanized Sleeve Anchors NINGBO YWC IMP. & EXP. CO.,LTD , https://www.nbywc-fastener.com